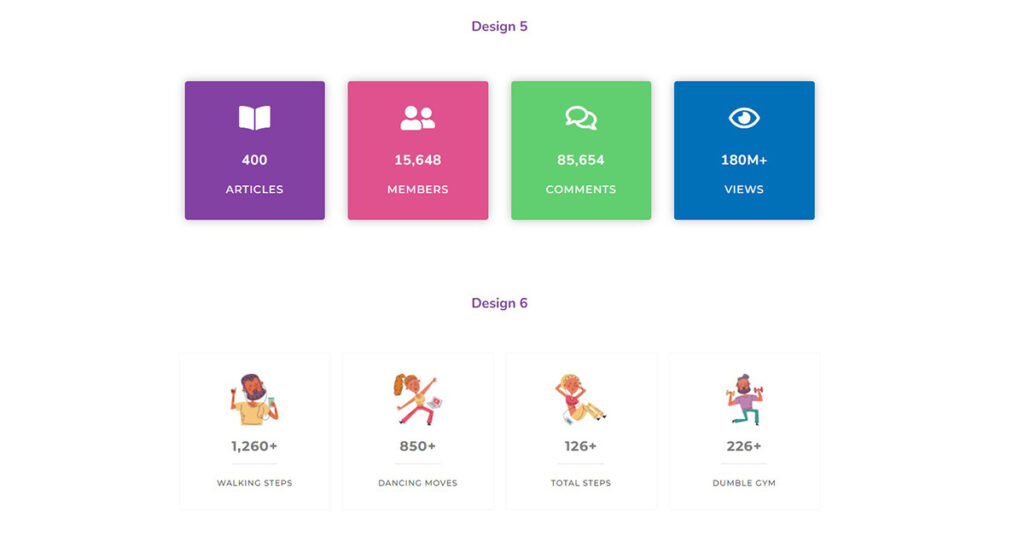
Do you want to Showcase your Accomplishments and Major Milestones in a very professional manner by adding an Advanced Counter widget to your Elementor website? But don’t know the process of using it? Don’t Worry! You have landed on the right spot.
In this article, we will demonstrate to you step by step process of using the Advanced Counter widget in Elementor.
What is Advanced Counter?
The Counter Widget allows you to create dynamic counters that display numbers or statistics on your website. These counters can be customized in terms of appearance and behavior and can be used to highlight key metrics, progress bars, and other numerical data in an engaging and interactive way.
What is the Importance of Advanced Counter?
The Advanced Counter Widget is important because,
It allows users to easily track and display numerical data in real-time, providing valuable insights and information for decision making. This can be useful in a variety of situations, such as
- Counting website visitors.
- Tracking the progress of goals.
- Monitoring the status of projects.
- Displaying the number of items in an inventory, etc.
The widget’s ability to display and update numerical information helps users stay informed and up-to-date on key metrics.
So, if you want to add a User-Friendly, Easy to Use, and Reliable Advanced Counter widget to your website then the Advanced Counter widget of Sky Addons is the best solution for you. It has lots of cool features which will help you to present your data effectively and make it easier for viewers to comprehend.
Now let’s jump into learning the detailed process of using the Advanced Counter widget.
To Insert widget
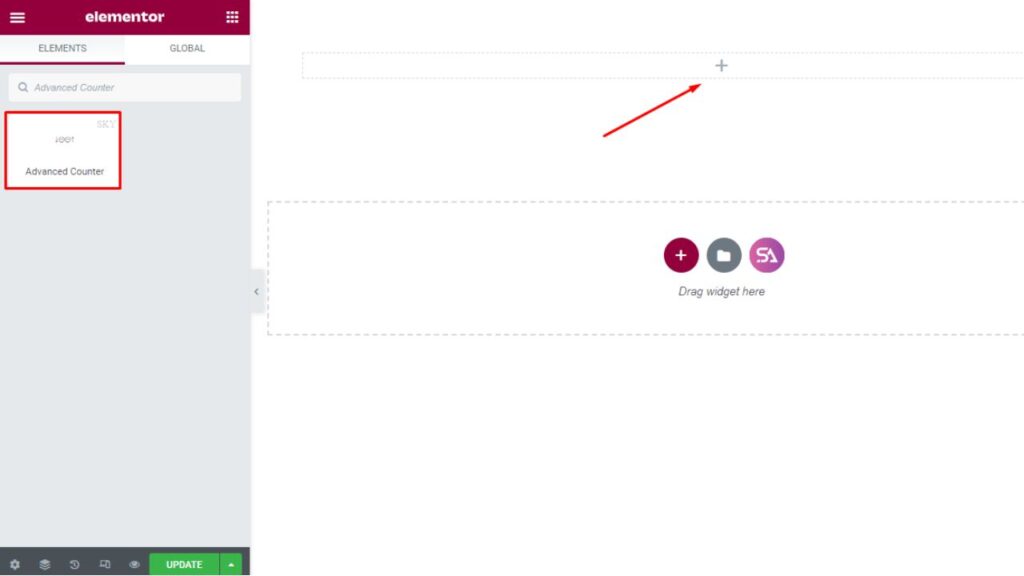
Start by going to your Elementor Editor panel and finding the Advanced Counter widget of Sky Addons. Then simply drag it to the selected location and drop it there.
Content Tab
Now click on the Content tab. There are a number of useful sections on this tab that will make it easier for you to layout a particular part of a website.
You will find ‘Layout‘ and ‘Counter Settings’ sections under the ‘Content‘ tab.
Counter Layout
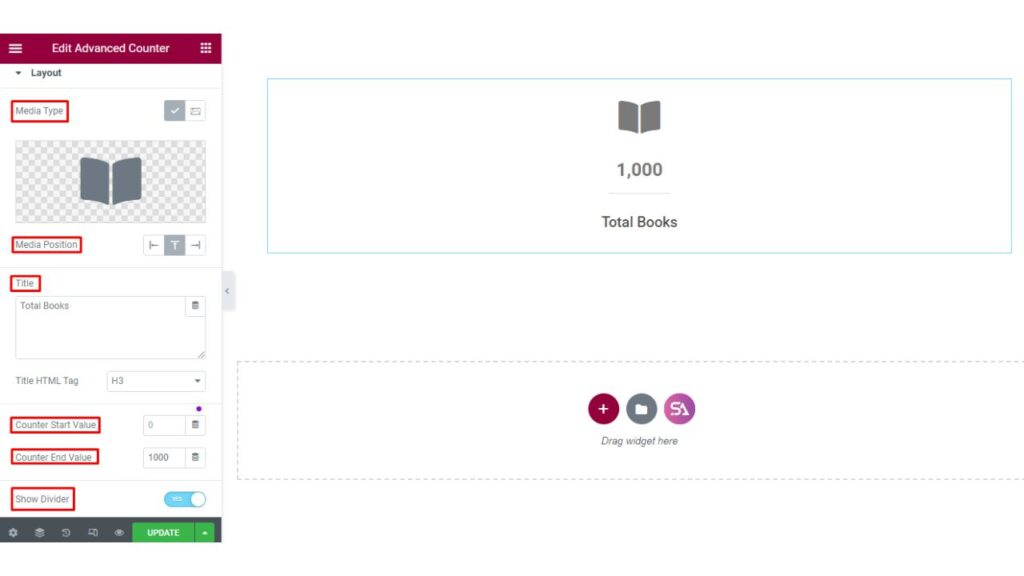
Firstly in the ‘Layout‘ section, you will be able to select the Media Type.
You may set the Media Type to Icon or Image whatever you want to use. Then you can select the Media Position, and change the Title.
Here you will find options to set the ‘Counter Start Value‘ and ‘Counter End Value‘. Also if you won’t want to show the divider on the counter you can easily disable that from here.
Counter Settings
The counter settings section allows you to select the duration. You can use easing and grouping.
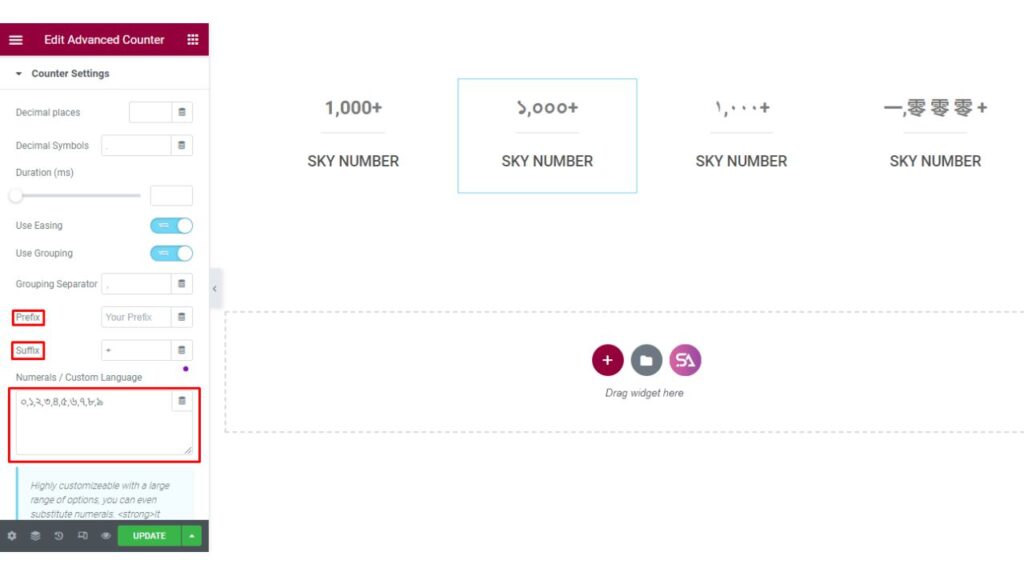
From here, you can add Prefix and Suffix to the counter.
Prefix and Suffix are characters or symbols added to the front or back of a numerical display in a counter widget.
Prefixes appear before the main numerical data, and suffixes appear after it. They can be used to add units of measurement, currency symbols, or contextual information to the numerical data to provide additional clarity and context.
You can set decimals on the counter by adding Decimal Symbol. You may also set the Decimal Position by adjusting the Decimal Places.
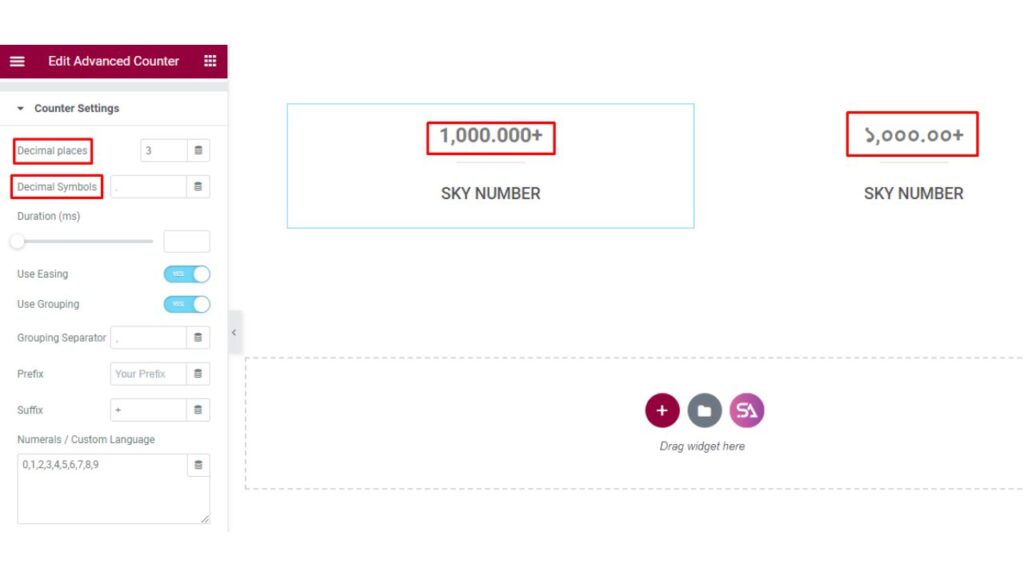
This Advanced Counter widget is highly customizable with a large range of options, you can even substitute numerals.
It supports any Language. You can add any language you want to add just by adding some numbers in the Numerals/Custom Language box. It’s so easy to use.
Style Tab
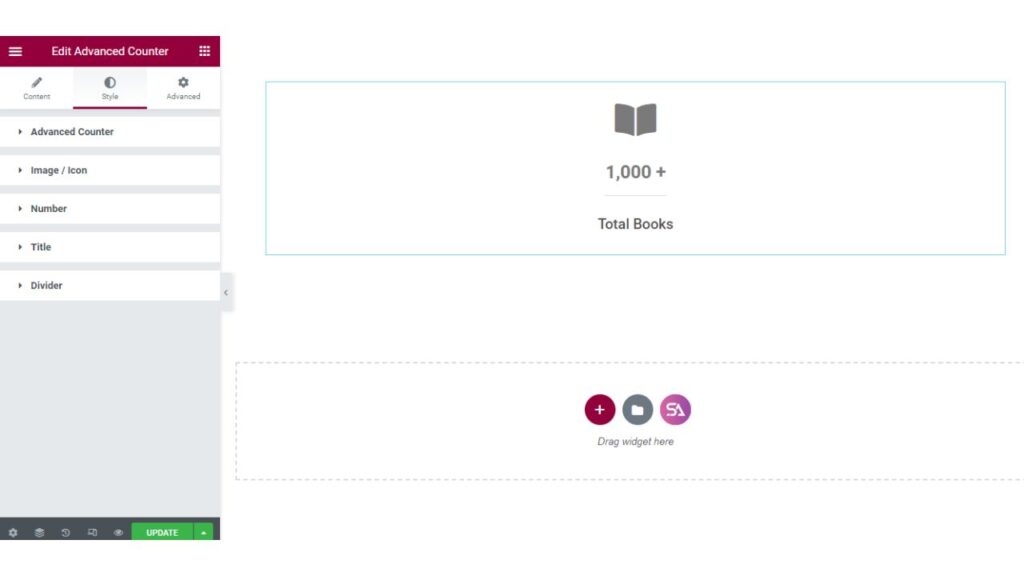
Now we move to the ‘Style‘ tab. Here you can edit the Counter.
This Style tab consists of 5 sections, they are ‘Advanced Counter, Image/Icon, Number, Title, and Divider‘.
Advanced Counter
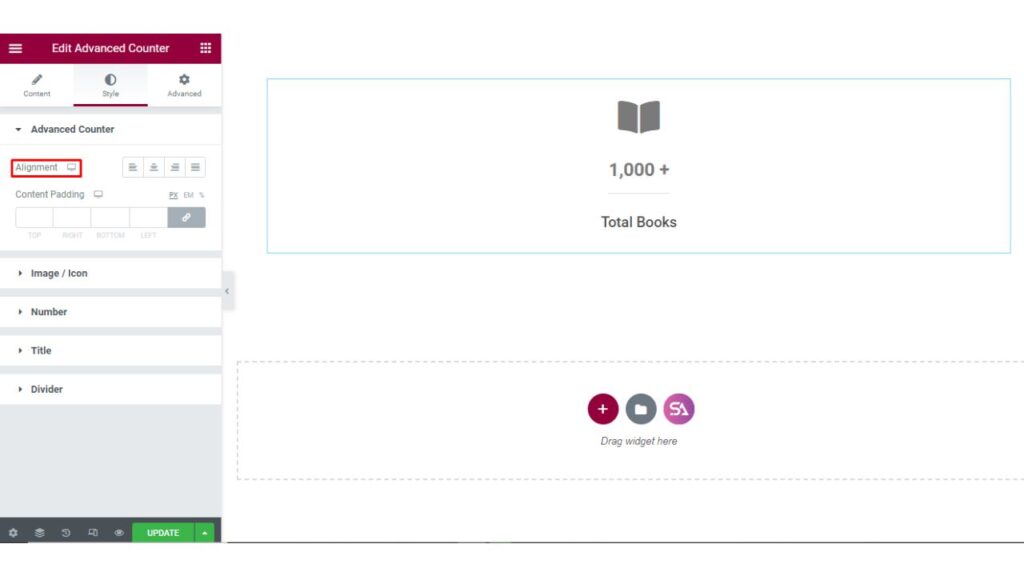
The first section is the ‘Advanced Counter‘. Here you can change the alignment and content padding of your counter.
Image/Icon
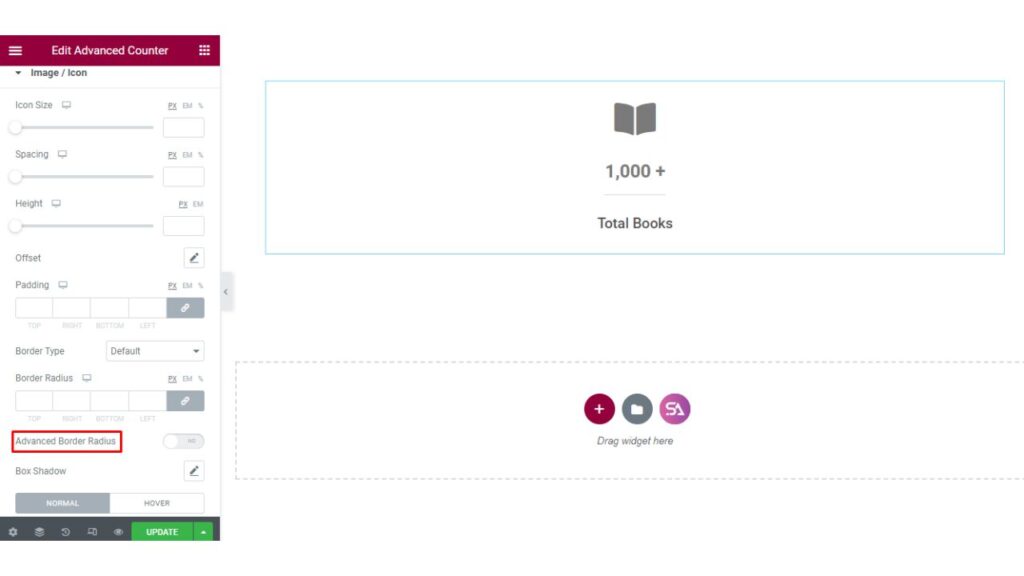
Next is the ‘Image/Icon‘ section. Here you can change the icon/image size, use spacing. Adjust its height-weight and padding.
You may select the border type and Border-Radius. Here is also a similar but advanced option which is ‘Advanced Border Radius‘ which will increase the beauty of your counter.
In the context of a counter widget, the Advanced Border Radius refers to the degree of curvature applied to the corners of a rectangular element, such as a counter widget. The Border Radius is a CSS property that controls the rounding of the corners of an element.
And the Advanced Border Radius refers to the ability to control the border radius of an element with more precision and customization options. An advanced border radius can allow designers to create unique and visually appealing shapes, such as circular counters or counters with rounded edges, that stand out and improve the overall design of a web page.
By using an Advanced Border Radius, designers can create elements that are visually appealing and engaging, and that adds to the overall user experience of a website or application.
Here you can also use a Hover Effect and many more cool options like that to make your Advanced Counter more stylish.
Counter Number
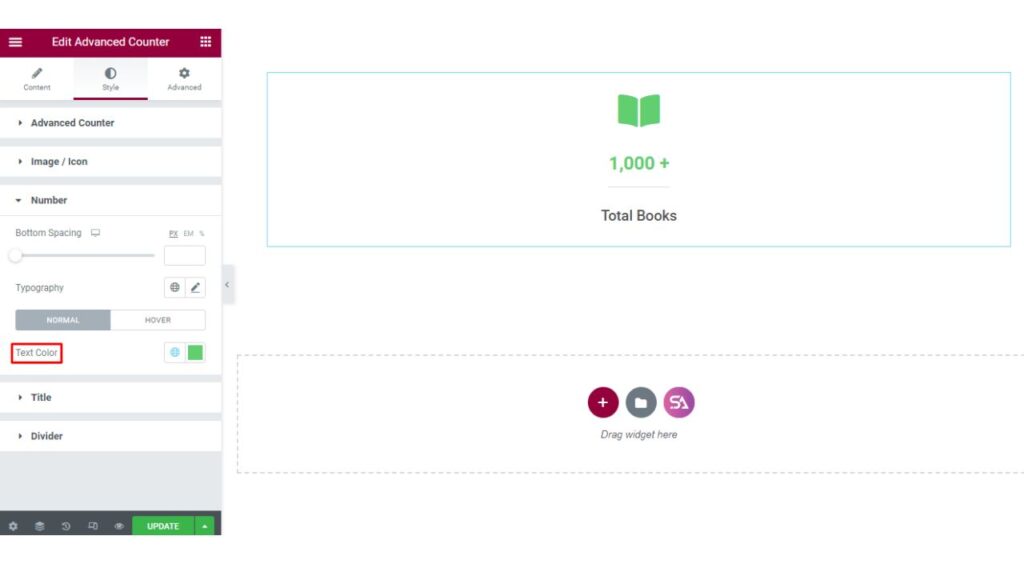
In the ‘Number‘ section, you will be able to use bottom spacing. You can select typography and change text color. Also if you want you can add a hover effect as well.
You will find all the similar options for the ‘Title’ section also.
Divider
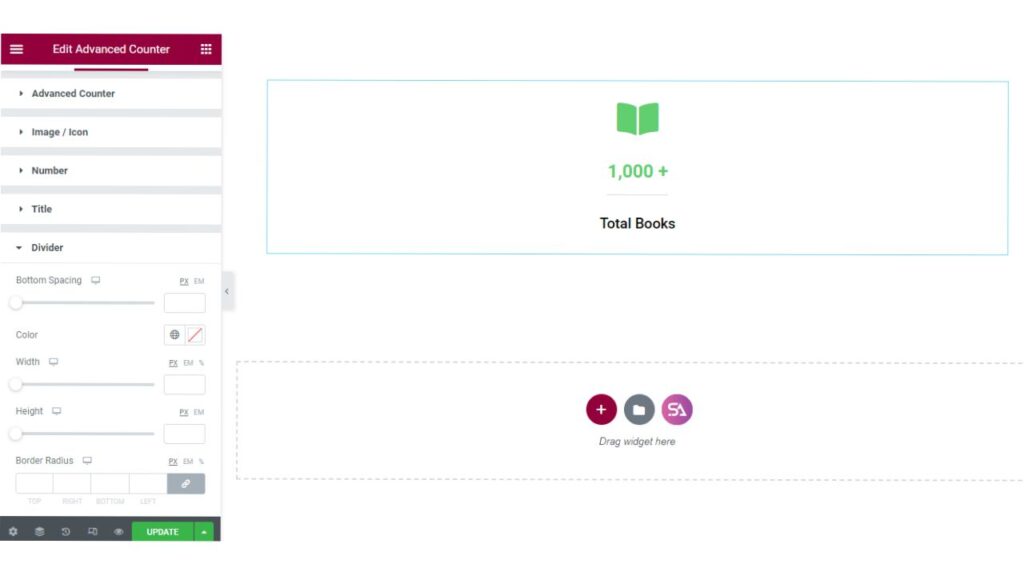
The last section is the ‘Divider‘ section.
The Divider is a visual element that separates or divides sections of a web page into distinct parts. A divider can be represented by a line, a border, or a spacing between elements, and it is used to improve the organization and structure of a web page
Here you will be able to select the divider color. You can its height-width and many more options for editing the divider
Finally, we are done with the tutorial. We hope that you have understood the whole process of using the Advanced Counter widget of Sky Addons in Elementor.
If you have any questions or queries regarding this please feel free to contact our website – https://wowdevs.com/support/
And don’t forget to visit our demo website – https://demo.skyaddons.com/elementor-advanced-counter-widget/

