Are you in need of creating Post Thumbs lines that work Remotely with another Carousel/Slider widget? Want to add Remote Thumbs widget to your WordPress website using Elementor? But don’t know the process of using it? No Problem! You are in the right place.
In this article, we will guide you step by step process of using the Remote Thumbs widget in Elementor.
What are Remote Thumbs?
Remote Thumbs are actually a form of navigation that you can link up to any widget with a navigation function like a carousel or slider. Instead of the number or arrows, you can display a miniature post thumb to let people interact with a slider. This way you can find the Carousel/Slider widget linked to the remote thumbs for a unique and tasteful user experience.
There are plenty of similar widgets in the marketplace. But you need to choose the unique and easy one, which will save your time and effort. In that case, you should think about the Remote Thumbs widget of Sky Addons. It is so easy to use and allows you to customize every portion of it.
So let’s begin learning the step-by-step process of using the Remote Thumbs widget of Sky Addons.
To Insert Widget
Firstly go to your Elementor Editor and find the Remote Thumbs Widget of Sky Addons and then simply drag and drop it under a Carousel/Slider.
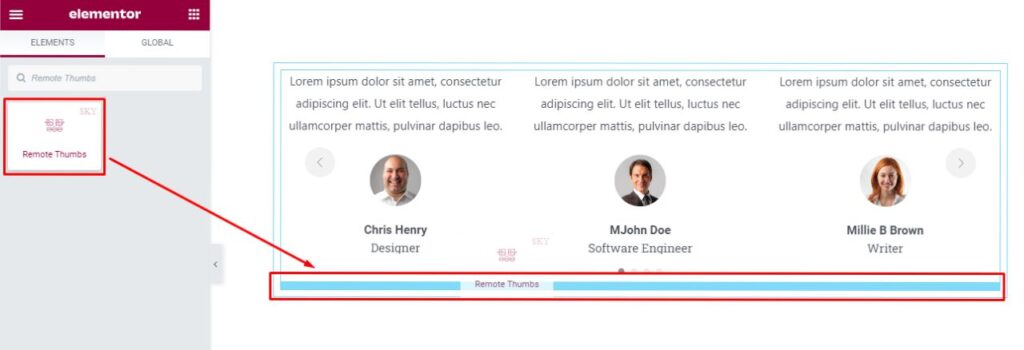
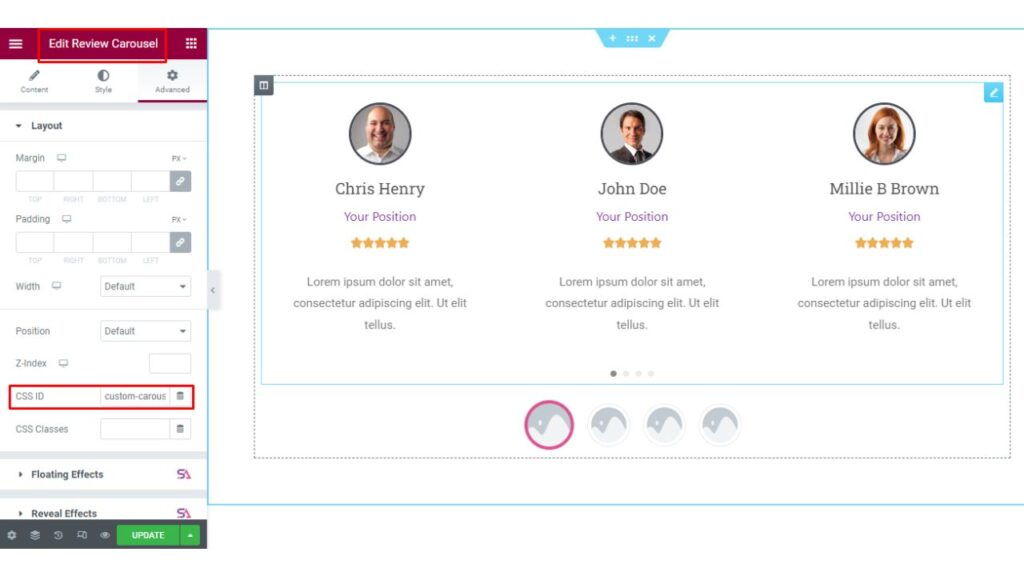
Here you need to connect the Remote Thumbs to your Carousel/Slider. To do that first, go to the Carousel/Slider’s Advanced Tab. Under this tab, you will find a box named CSS ID. Now type a CSS ID for the carousel that we will be using in the thumbs. After that copy the text and paste it inside the Remote ID field of the Remote Thumbs. At this, you can start clicking the thumbs to navigate the testimonial carousel remotely.
Content Tab
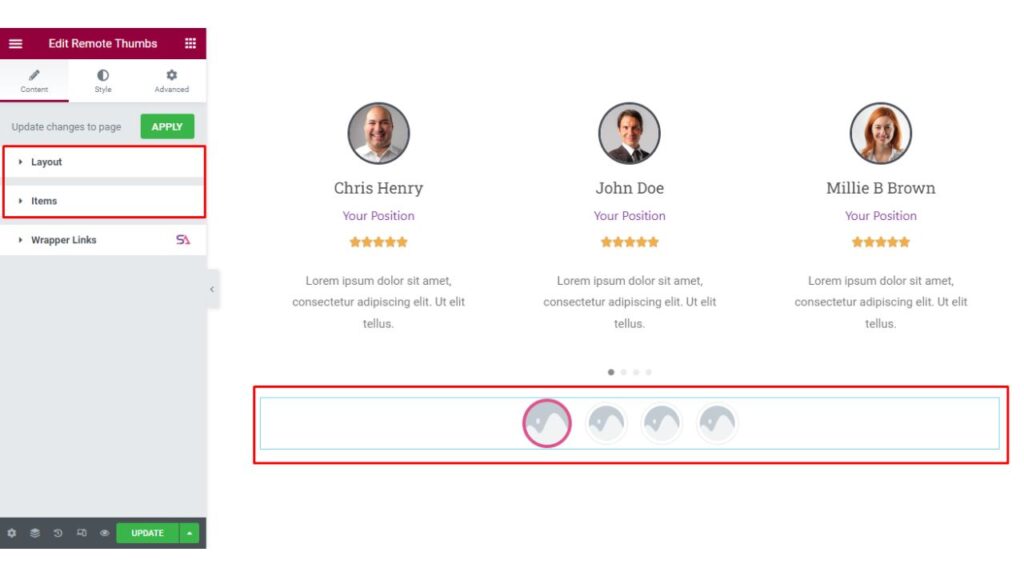
Now click on the Content tab. clicking on the Content tab under it you will find 2 sections – Layout and Items.
Layout
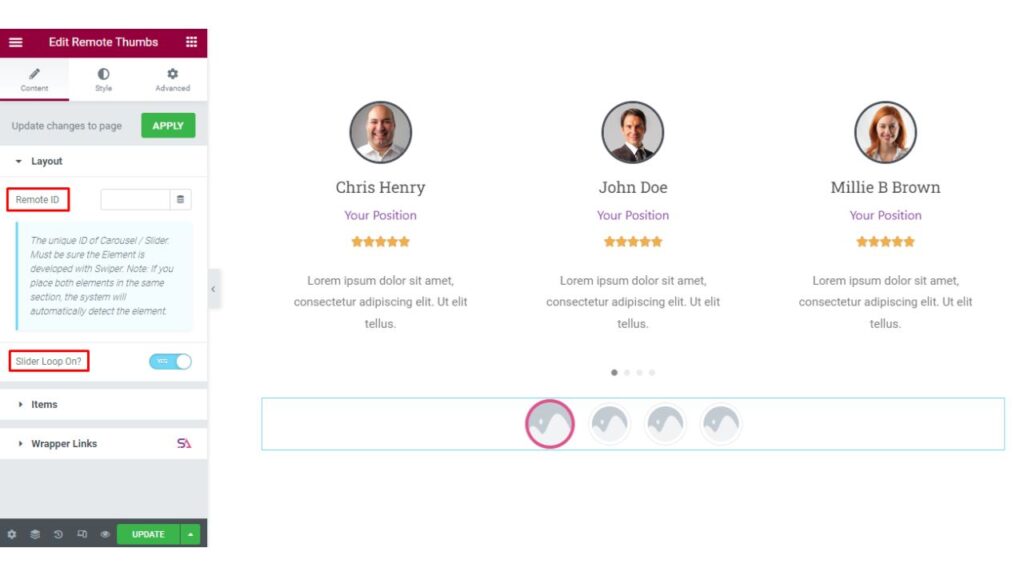
In the Layout section, firstly you can add the Remote ID.
Remote ID: The Remote ID is the unique ID of the Carousel/Slider. Remote ID refers to a unique identifier that is assigned to a widget that is hosted on a remote server. This identifier can be used to reference the widget from other parts of the website or application, such as to access its data or to control its behavior.
The remote ID allows multiple instances of the same widget to be used on a single page or across multiple pages and ensures that each instance can be identified and manipulated independently.
In this Remote Thumbs widget the unique ID of Carousel / Slider. Must be sure the Element is developed with Swiper.
If you place both elements in the same section, the system will automatically detect the element.
In this Layout section, you will find a switcher Slider Loop On. If you want to loop the slider then enable it otherwise, keep it disabled.
Items
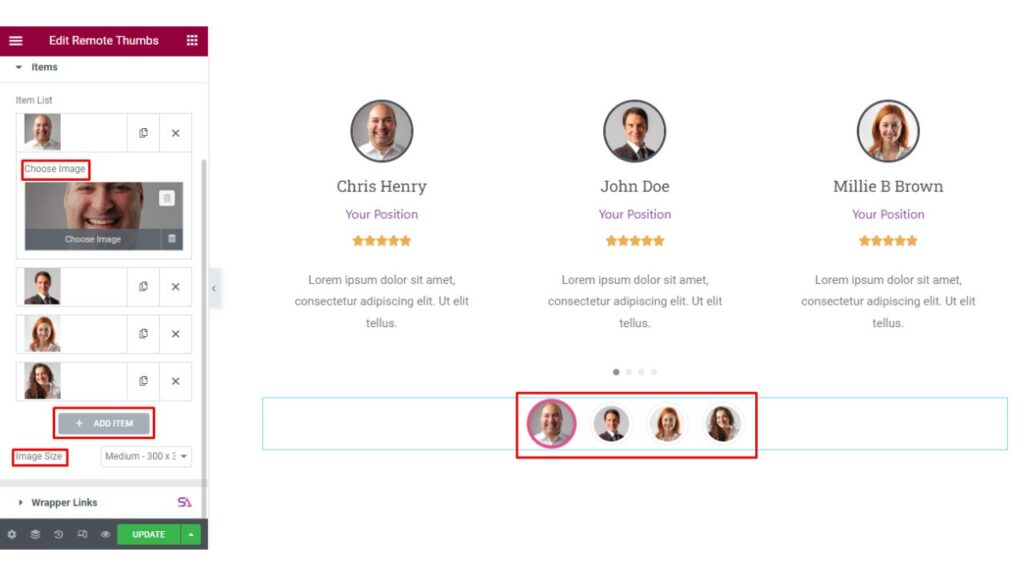
In the Items section, you are allowed to add as many as Item List you want to add just by clicking on the Add Item button.
When you will click on any item, you will be able to add Images for it.
Style Tab
Now we move to the Style tab. Here you can style the Remote Thumbs in the best possible way. Under the Style tab you will find 2 sections. They are – Common and Thumbs.

Common
Firstly in the Common section, you can Select the Layout you want to display on your website. You will get 2 different layout options. And you may also select the Alignment according to your choice, you will see 5 different Alignment changing options. You can select any one Alignment option from those five.
You will also be able to Adjust the Column Gap, Offset, etc.

Thumbs
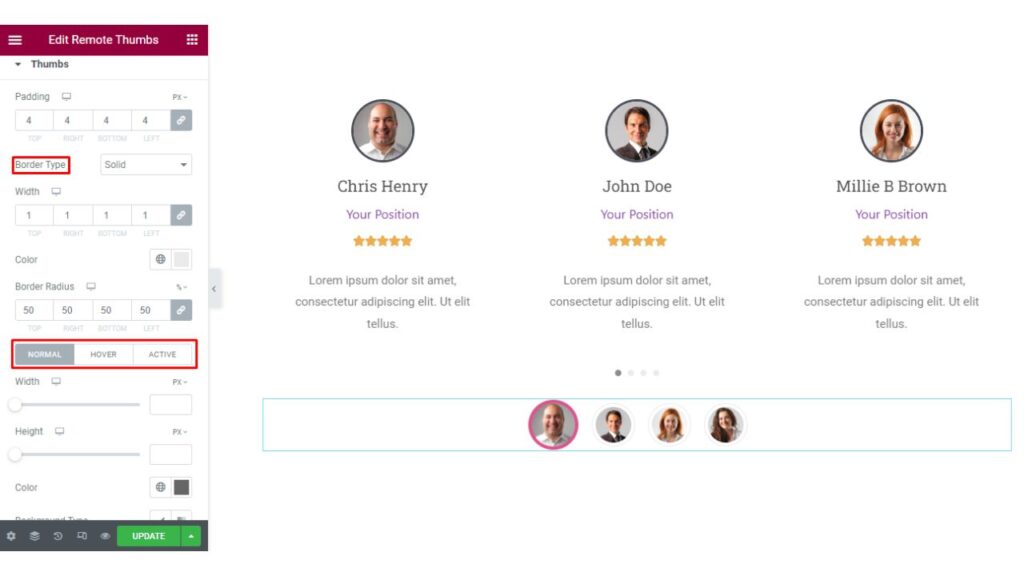
The Last section is the Thumbs section. Here you can style the Thumbs in various ways.
You may change the Icon Size, change the Typography, Adjust Padding, select the Border Type and Border-Radius, etc.
You can also add a Hover effect. You will be able to set 3 different Colors for the Thumbs, one for Normal Mode, another one for Hover Mode, and the last one for Active Mode.
By doing all those stylings, your Remote Thumbs will stand up and increase the beauty of your design.
Finally, we are now done with the tutorial. We hope that you have understood the whole process of using the Remote Thumbs widget of Sky Addons in Elementor.
If you have any questions or queries regarding this please feel free to contact our website – https://wowdevs.com/support/
and don’t forget to visit our demo website – https://demo.skyaddons.com/elementor-remote-thumbs-widget/

